Dealing with a flat tire on the road can be an inconvenient and stressful experience, but it doesn't have to be. With the right tools, some preparation, and a bit of patience, you can change your tire safely and get back on the road in no time. This step-by-step guide will walk you through everything you need to know to fix a flat tire on the side of the road.
What You’ll Need:
Before you begin, make sure you have the following tools and equipment:
- Spare tire: Ideally, this should be the same size as your regular tire.
- Car jack: A tool used to lift the vehicle off the ground.
- Lug wrench: A tool used to loosen and tighten the lug nuts.
- Tire wedges or chocks: To prevent the vehicle from rolling.
- Vehicle owner’s manual: For specific instructions and tire-changing information.
- Gloves (optional): To protect your hands from dirt and grime.
- Flashlight (optional): Especially helpful if you're changing the tire at night.
Step 1: Find a Safe Location
Safety is the first priority when fixing a flat tire on the road. If you're driving, and you notice the tire has gone flat, gently reduce your speed and look for a safe place to pull over. Ideally, pull off the road to a flat, stable surface away from traffic. This will reduce the risk of an accident and allow you to work more comfortably. If you’re on a busy road or highway, it’s best to park on the shoulder or an emergency lane.
Once you've parked, turn on your hazard lights to alert other drivers. This is especially important if you are on the side of the road or in low visibility conditions like fog or nighttime driving. Engage the parking brake to prevent the vehicle from moving.
Step 2: Loosen the Lug Nuts
Before jacking up the vehicle, you need to loosen the lug nuts holding the flat tire in place. The lug nuts can be quite tight, so it’s important to loosen them while the tire is still on the ground to prevent the vehicle from moving.
Take your lug wrench and fit it over the lug nuts. Turn the wrench counterclockwise to break the resistance. It's best to use your body weight to apply pressure and loosen the nuts. You don’t need to remove the nuts completely at this stage—just loosen them so they are easy to take off later. If you have difficulty loosening them, try applying more force or using the long end of the wrench for more leverage.
Step 3: Jack Up the Car
Now it’s time to lift the vehicle. Position the car jack beneath the jacking point of your vehicle. The jacking point is typically located near the wheel you're replacing, often marked with a notch or arrow in the car’s manual. Make sure the jack is properly aligned before you start lifting the car.
Once in position, pump the jack to lift the car off the ground. You will need to pump it until the flat tire is about 6 inches off the ground. This will give you enough clearance to remove the tire and replace it with the spare. Check the stability of the car as it lifts to ensure it's securely supported by the jack.
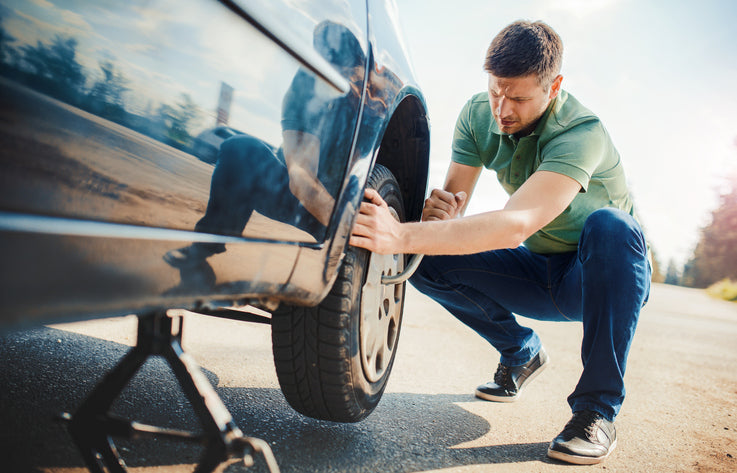
Step 4: Remove the Flat Tire
With the car now lifted, you can proceed to remove the flat tire. First, finish unscrewing the lug nuts that you loosened earlier. Place them in a safe location—like the hubcap or a small container—so they don’t roll away. After all the nuts are removed, carefully remove the flat tire by pulling it off the wheel bolts. If it’s stuck, gently wiggle it to break any rust or debris holding it in place.
Now, take a moment to inspect the flat tire. Check for visible damage, such as punctures, cuts, or tears. If you’re planning to repair the tire, you can assess the damage. Otherwise, keep the flat tire aside for disposal or repair later.
Step 5: Install the Spare Tire
Take your spare tire and align it with the wheel bolts. Slide the spare tire onto the bolts and ensure that it fits snugly against the hub. Be careful not to let the tire fall, as you don’t want to risk injuring yourself.
Once the spare tire is in place, hand-tighten the lug nuts onto the bolts. You don’t need to use the wrench just yet—just screw the nuts on as much as you can by hand to secure the tire. This will prevent the tire from shifting while you lower the car.
Step 6: Lower the Car
Now that the spare tire is in place, it’s time to lower the car back to the ground. Slowly release the jack by turning the release valve or lowering lever (depending on the type of jack you’re using). Keep an eye on the tire and make sure it remains in place as the car comes down. You’ll want the car to settle gently on the spare tire, with the full weight of the vehicle resting on the tire and the ground.
Once the car is back on solid ground, remove the jack and store it in your trunk.
Step 7: Tighten the Lug Nuts
Now that the car is lowered, it’s time to securely fasten the lug nuts. Use the lug wrench to tighten the nuts in a star or criss-cross pattern. Start with one nut, then move to the opposite side, and continue tightening each lug nut until all are snug. This pattern ensures that the tire is evenly secured.
Use as much force as you can to make sure the lug nuts are tightly fastened. If you’re unsure if they’re tight enough, use your body weight to get extra torque.
Step 8: Check Tire Pressure
Before you drive away, it’s important to check the pressure of the spare tire. If you have a tire pressure gauge, measure the pressure and ensure it meets the manufacturer’s recommended level. If you don't have a gauge, make sure the tire feels firm and properly inflated.
It’s especially crucial to ensure that the spare tire is not underinflated, as this could cause further damage to your car or lead to another flat tire.
Step 9: Store Your Tools
Once you’ve finished replacing the tire, it’s time to clean up. Store the flat tire, lug wrench, jack, and any other tools back in your car. Ensure everything is secured in your trunk to avoid loose items while driving. If the flat tire is repairable, make sure to take it to a professional as soon as possible for patching or replacement.
Step 10: Visit a Mechanic
If you’ve used a temporary spare tire (often called a “donut” tire), remember that this tire is not meant for long-distance or high-speed driving. It is only designed to get you to the nearest mechanic or tire shop. Visit a mechanic as soon as possible to replace or repair your regular tire.
Tips for Preventing Flats:
- Regularly check the pressure of your tires to ensure they’re properly inflated.
- Inspect your tires for signs of wear and replace them if necessary.
- Drive carefully, avoiding potholes and sharp objects on the road that can cause tire damage.
Changing a flat tire may seem daunting, but with the right tools and a little knowledge, you can handle the situation confidently. By following these steps, you’ll have your spare tire on and be back on the road in no time. Keep your emergency roadside kit stocked and stay safe out there!