
The Toyota Hilux 3.0L diesel is a reliable workhorse, but like all engines, it requires regular maintenance to keep it running smoothly. One of the most crucial components to maintain is the timing belt. If it fails, it can cause catastrophic engine damage. Toyota typically recommends replacing the timing belt around 150,000 km or every 5–7 years, whichever comes first.
This guide walks you through replacing the timing belt on a 3.0L diesel Hilux (commonly the 1KD-FTV or 5L-E engines), suitable for most home mechanics or professionals.
Tools & Parts You’ll Need
Tools:
-
Socket set (including 10mm, 12mm, 14mm, 17mm)
-
Torque wrench
-
Screwdrivers
-
Breaker bar
-
Pulley puller (if needed)
-
Jack and stands
-
Harmonic balancer puller
-
Timing belt tensioner tool or Allen key
-
Marker pen or white paint
Parts:
-
Timing belt kit (includes belt, idler pulley, tensioner)
-
Water pump (optional but recommended)
-
Drive belts (if worn)
-
New crankshaft bolt (recommended)
-
Coolant (if replacing the water pump)
-
Gasket sealant (if required)
Step-by-Step Timing Belt Replacement
1. Preparation & Safety First
-
Park the Hilux on a level surface.
-
Disconnect the negative battery terminal.
-
Engage the handbrake and place the vehicle in gear (manual) or park (auto).
-
Raise the front of the vehicle and place it on jack stands.
2. Remove the Engine Covers & Accessories
-
Remove the top engine cover and any plastic guards around the timing area.
-
Remove the fan shroud and radiator fan for easier access.
-
Loosen and remove the serpentine/drive belts (aircon, alternator, power steering).
3. Align Top Dead Centre (TDC)
-
Rotate the crankshaft pulley clockwise using a socket and breaker bar.
-
Line up the TDC timing marks on the crankshaft pulley and camshaft sprocket.
-
Double-check that the #1 cylinder is at TDC on the compression stroke (both cam lobes for cylinder #1 pointing upward).
4. Remove Crankshaft Pulley & Timing Cover
-
Remove the crankshaft bolt (this can be very tight; use a breaker bar or rattle gun).
-
Use a harmonic balancer puller to remove the crankshaft pulley.
-
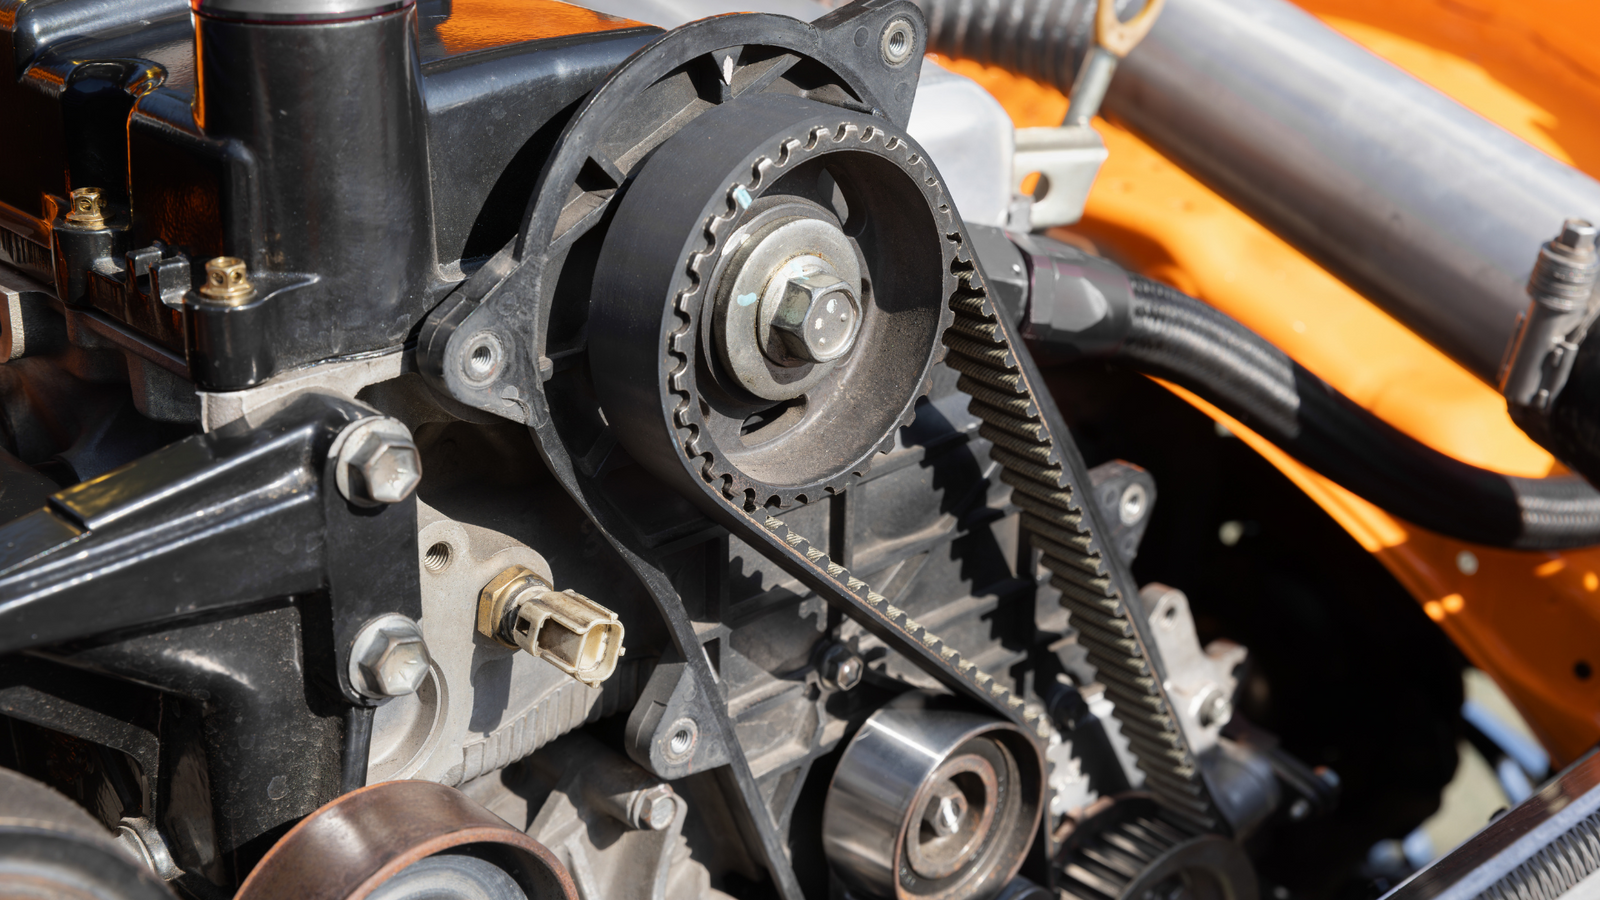
Unbolt and remove the timing belt covers (upper and lower).
5. Inspect Components
-
Inspect the timing belt, tensioner, and idler pulley.
-
If replacing the water pump, now is the time to drain the coolant and remove it.
-
Inspect oil seals for leaks behind the crank and cam sprockets.
6. Mark Timing Belt and Gears
-
Use a paint pen or marker to mark the relationship between the crankshaft, camshaft gears, and timing belt.
-
This helps maintain alignment during reassembly.
7. Remove the Timing Belt
-
Loosen the tensioner pulley (some models use a spring-loaded or hydraulic tensioner).
-
Carefully remove the old timing belt. Avoid rotating the cam or crankshaft during this step.
8. Install New Timing Belt and Components
-
Install the new idler pulley and tensioner (torque to spec).
-
Position the new timing belt, ensuring all timing marks are aligned.
-
Tension the belt per manufacturer specifications (typically rotate the tensioner until the belt is taut, then lock it).
Tip: Rotate the crankshaft by hand (2 full revolutions clockwise) and recheck that all timing marks still align.
9. Reinstall Crankshaft Pulley and Covers
-
Reinstall the timing belt covers.
-
Fit the crankshaft pulley, and torque the bolt to spec (usually 312 Nm / 230 ft-lb on 1KD engines).
-
Use threadlocker if specified.
10. Refit Belts, Fan, and Covers
-
Refit all drive belts (adjust tension as needed).
-
Reinstall the radiator fan and shroud.
-
Replace the top engine cover and any sensors or clips removed earlier.
11. Refill Coolant & Reconnect Battery
-
If you replaced the water pump, refill coolant and bleed the system of air.
-
Reconnect the negative battery terminal.
12. Start Engine & Test
-
Start the engine and listen for any abnormal noises.
-
Watch the belt rotation to ensure everything spins correctly.
-
Let the engine warm up and check for leaks.
-
Go for a short test drive and recheck coolant level and belt tension if needed.
Final Thoughts:
Replacing the timing belt on a Toyota Hilux 3.0L diesel might seem daunting, but with the right tools and attention to detail, it's a manageable DIY job. Always refer to your vehicle’s service manual for torque specs and specific details.
If you're not confident, it's worth paying a trusted mechanic—it’s far cheaper than repairing engine damage caused by a failed belt.
Looking for Quality Parts?
At Universal Auto Spares, we stock timing belt kits, water pumps, and accessories specifically for Toyota Hilux 3.0L diesel engines.
👉 Shop Hilux Timing Belt Kits Now
📦 Fast shipping Australia-wide | 🔧 Trusted Brands | 💬 Expert Support
Let me know if you'd like a printable version, a product-linked version for your Shopify blog, or a short social caption to promote it.