
Proper engine oil maintenance is essential for the smooth operation and longevity of your vehicle's engine. Engine oil lubricates vital components, reduces friction, and helps dissipate heat. Regularly checking and topping up your engine oil ensures optimal performance and protects your engine from unnecessary wear and tear. In this comprehensive blog post, brought to you by Universal Auto Spares, we will guide you through the step-by-step process of checking and topping up your engine oil, empowering you to take control of your vehicle's maintenance.
The Significance of Engine Oil Before diving into the process, it's crucial to understand why engine oil is vital for your vehicle's performance. Engine oil lubricates moving parts, prevents metal-to-metal contact, and helps maintain proper engine temperature. Over time, oil can degrade, become contaminated, or experience loss due to consumption or leaks. Regularly monitoring and maintaining the correct oil level ensures optimal engine performance and protects against potential damage.
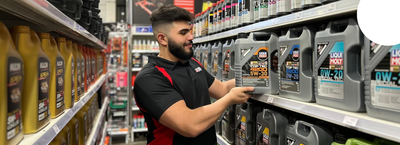
Tools and Materials Needed Gather the following tools and materials before starting the process:
- Clean shop towels or rags
- Safety gloves and goggles
- Your vehicle's owner manual
- Engine oil (matching the manufacturer's specifications)
- Funnel (if needed)
How to Check Your Engine Oil Follow these step-by-step instructions to check your engine oil:
Step 1: Prepare Your Vehicle Ensure that your vehicle is parked on a level surface and the engine has been turned off for at least 10 minutes. This allows the oil to settle back into the oil pan.
Step 2: Locate the Dipstick Refer to your vehicle's owner manual to locate the engine oil dipstick. The dipstick is usually marked with a brightly colored handle and is inserted into the engine block.
Step 3: Remove and Inspect the Dipstick Carefully remove the dipstick and wipe it clean with a shop towel or rag. Reinsert the dipstick fully, then remove it again to check the oil level.
Step 4: Check the Oil Level Observe the markings on the dipstick, which indicate the minimum and maximum oil levels. The oil level should ideally fall between these two markers. If the level is below the minimum mark, it's time to top up your oil.
How to Top Up Your Engine Oil If the oil level is low, follow these steps to top up your engine oil:
Step 1: Select the Correct Oil Consult your vehicle's owner manual to determine the recommended engine oil type and viscosity. Ensure that the oil you choose matches these specifications.
Step 2: Locate the Oil Filler Cap Locate the oil filler cap, which is usually labeled and located on the top of the engine. Remove the cap to access the oil reservoir.
Step 3: Add the Engine Oil Using a funnel if necessary, pour the engine oil slowly into the oil reservoir. Be careful not to overfill, as this can lead to other issues. Add the oil in small increments, periodically rechecking the oil level with the dipstick.
Step 4: Recheck the Oil Level After topping up the engine oil, reinstall the dipstick and remove it again to verify that the oil level is within the recommended range. Avoid overfilling the oil reservoir.
Additional Tips and Maintenance: Here are some additional tips and maintenance guidelines for your engine oil:
- Regular Oil Changes: In addition to topping up the oil, ensure you schedule regular oil changes as per the manufacturer's guidelines to maintain optimal engine health.
- Oil Quality and Specifications: Always use engine oil that meets the manufacturer's